The process of designing and making a stole has many steps. In this post I hope to give an insight into what is involved so that you will understand how I work.
The first step is a discussion with the client. This might be in person at my studio or at a vestments fair at one of the theological colleges. It might all be conducted through emails, or it might involve a combination of zoom chats and emails, with perhaps the odd telephone call as well. Whichever way the discussions take place, the important thing is that we arrive at an outline of what the client wants that works with what I am able and willing to make.
Designs often evolve through this discussion process. A client might start off simply asking me to make a design exactly as they have seen in an earlier photo of my work, but then through discussion they become aware of different variations. In one of my Google Photos albums I have posted photos of my Celtic Angel design so that you can see the huge range of design possibilities that come from one basic design. Have a look here https://photos.app.goo.gl/8VDqdfvXwninsjoU8
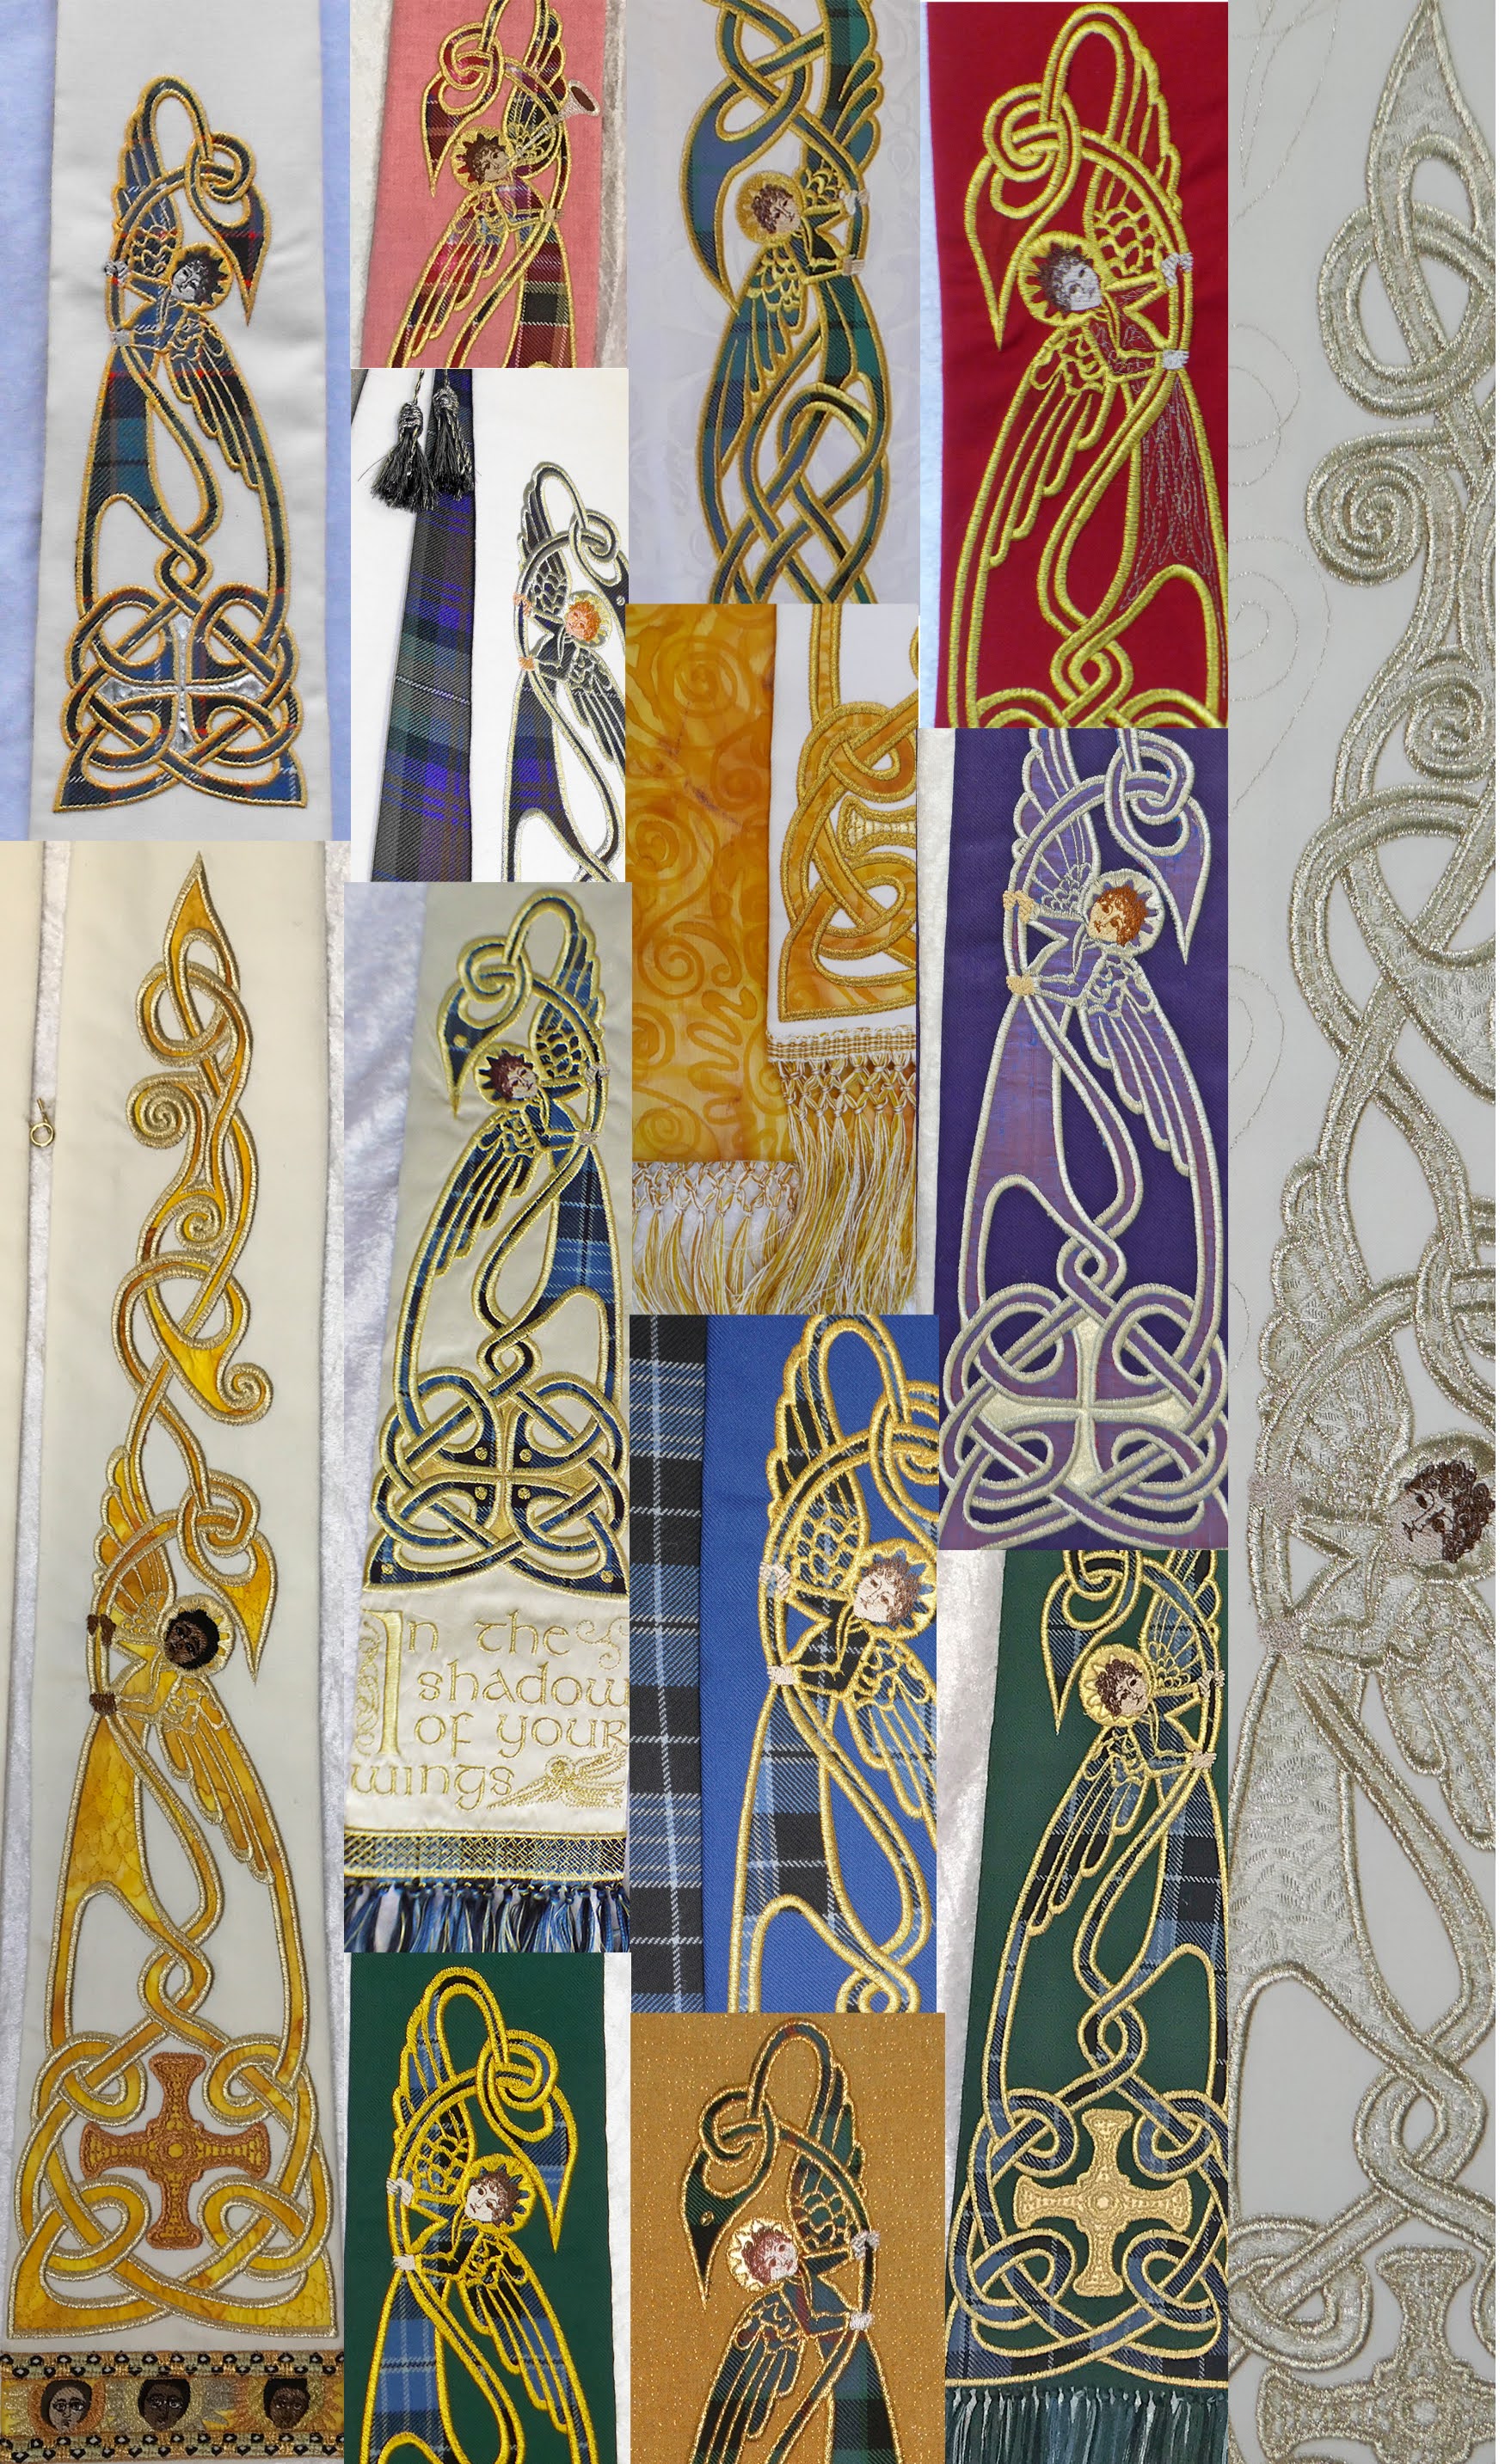
I picked the angel designs for this simply because it is one of the most popular design themes, but the same amount of variation is available on other designs.
Sometimes I am asked to incorporate imagery inspired by something of particular relevance to the client. It may be a statue in their church, an ancient cross, or as in this example, some sheep. Although there are features within embroidery design software that can (in theory) take an image and convert it to embroidery, experience has shown that the results are at best mediocre and often dreadful to look at as well as being troublesome to stitch out. Hand-digitising is invariably a much better path to follow, but takes time, experience and artistic ability.


At this stage I will have a clear idea of how long the embroidery will take and be able to give the client a firm quote for doing the work. There is usually scope for small alterations at this stage.
I make no charge for my services up to this point, but once the client has approved the design and paid the requested deposit, I will order any necessary fabrics and start work on the vestment. I keep a stock of plain fabrics in the main liturgical colours so always have these available. I also generally have a few different tartans and some plain silks always to hand.

Most of my work involves a process known as appliqué. This is where a piece of fabric is cut to a certain shape, laid on top of the main fabric and then held in place with decorative stitching. There is quite complex cutting involved so I generally do this using my laser cutting machine. Individual cutting files have to be prepared for every design - another time-consuming process.
When creating the embroidery files, I programme the computer so that a positioning outline is stitched first. This allows the appliqué shapes to be accurately placed before the decorative work begins. The time taken to stitch out a design can be anything from an hour to a few days depending on what I am making. Most of my stole designs will take about half a day for this stage.
Only once all the embroidery is complete - and checked for any flaws - does the construction work begin.

All my stoles are assembled by hand. First an interlining is sewn in. If there are fringes, they will be added at this stage and then the lining will be clipped in place and carefully sewn with tiny stitches. Fringes may be commercially woven, but this limits the choice of embroidery threads, so more often I will weave fringes specially. This is another hand-done process and adds a unique finishing touch. I often take this sort of work home with me so that I can sit in a comfortable chair with my back well supported while I work.
For chasubles and copes, more of the work will be done with

machine sewing, but there is always some hand sewing needed particularly for positioning of orphreys and for neck bindings and hems. The hand sewing on these larger items is alway done in my studio where I can spread the piece out over one of my height adjustable tables and ensure it stays flat as I sew.
When a piece is finished, it is pressed, gets a final check over, is photographed, wrapped up and then posted.
If you have some spare time, you can watch some videos of these processes - https://www.angelforce.co.uk/gallery-video.php
Comments
Post a Comment